

DIY Changing Towel & Board Bag with Justine!
- Justine Murray
- Feb 2, 2021
- 4 min read
Updated: Nov 4, 2025

DIY Changing Towel and Board Bag Tutorial
Board bags and changing towels can be super expensive. On the other hand, when they’re dirt cheap, you can probably assume that the people making them were not given fair wages or ethical working conditions. So if you don’t have the cash to buy from the most sustainable brand and you don’t want to support unethical companies, here’s how you can make your own - using second-hand materials! I promise it’s way easier than you think. I am very new to sewing so if I can do this so can you!

Things You’ll Need:
A sewing machine (if you don’t own one try asking around! I borrowed my neighbors.)
If you hate sewing, you can also try using fabric glue! I used it to make a design on my changing towel, but it’s super strong so you could probably use it for all of this and make it a no-sew project
Fabric: Check out your local thrift stores! They always have tons of fabric to choose from. I found a bunch of towels, and rad printed fabric. Just make sure you wash it first! If you’re not into used fabric, I also know that Joanne’s sells their scrap or old fabric for a discounted price. It’s just the leftovers from previous customers' fabric that they had cut so it has never been used before.


Instructions:
*Something to note: If you can’t find a big enough piece of fabric to cover your board bag or make the changing towel, you can always sew multiple pieces of fabric together like I did. Just make sure that instead of sewing them on top of each other, you sew the fabric pieces together with the “good sides”/the sides you want showing facing each other. That way the side with the visible seams will be on the inside of the bag/changing towel and the outside will look clean.
Board Bag:

Lay your fabric out over your board bag and trace all the way around it giving yourself about 4 extra inches. Keep your fin in your board so that you can allow extra fabric for when you are measuring around it. If you have a large enough piece of fabric, you can also fold it in half before you trace the shape so that you only need to sew up one side instead of two.
If you used two pieces, sew the two halves together with the “good sides” facing each other. *If you are using multiple pieces and patterns of fabric like I did, you will need to fold/pleat the part of the fabric that is going around the fin so that it can expand to fit around it when you connect the pieces vertically. (I show this in the video).
Lay the fabric flat and at the bottom of the bag fold the fabric up to make a 4 inch tube. Pin it in place and sew along the edge of the fabric to create a tube that will later be used to tighten and close up the board bag.
Now fold over the bag onto itself (with the “good” sides facing each other and the “bad” sides facing out). Now just sew the other half of the board bag together along the outer edges. Make sure you stop at the bottom of the bag where the tube starts so that you don’t sew it closed.
You can sew scrap fabric together to make a “string” and run it through the tube with a safety pin so that you are able to tie the board bag closed. Now just flip it right side out, slide your board in and tie it closed!


Now your board is protected from scratches, dirt, and dings for travel, and it looks great. Cheers!

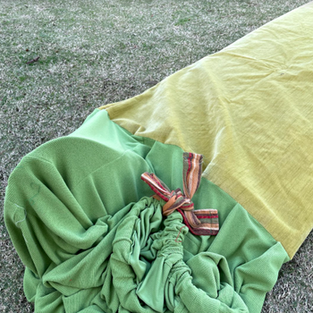
Changing Towel:


Cut two rectangles (46”X38” are the measurements that I used, but you can totally adjust this for your height and size). If you have a large enough piece of fabric you can also just cut a rectangle that is 46”X76” and fold it over to minimize the amount of sewing or gluing you have to do.
(Optional: Only do this step if you don’t want the arm hole to have a raw hem). On the 46” sides or the longer sides, make a small cut about an inch into the fabric 11 inches down from the top. This is going to be the arm hole. Fold that flap onto the “bad” or inside of the fabric and sew it to make a clean seam. Repeat this step 3 more times. Make sure you don’t sew onto the second piece of fabric and close the arm hole.
Lay the two pieces of fabric on top of each other with the good sides facing each other and the bad side facing you. 11 inches from the top (starting after the arm holes), sew both pieces of fabric together.
At the top of the fabric, measure where the middle is. Cut a neck hole in the middle that is 8” wide and about 1” deep.
Sew the two pieces of fabric together to the left and right of the neck hole.
(Optional) Sew one piece at a time around the neck hole (making sure not to sew it closed). I sewed two seams like this just to make sure the neck hole doesn’t fray, but it's totally up to you. You can also hem the bottom of the changing towel to make sure it doesn’t fray and to make sure it’s the right length for you. Just make sure you fold the towel inwards so the seam doesn’t show on the outside. Then flip it right side out and you’re done. (I also used fabric glue to make a design on mine so feel free to do that if you want and personalize yours.)


Now it won’t take you 20 minutes to towel change after a surf-like it does for me. Cheers!
Good on you if you made it through all of that! Not as bad as it seems and now you’re sustainably surf ready with second-hand gear!
If you have any questions you can always shoot me a dm @justinejmurray. Also feel free to post your own creations on your story and tag me @justinejmurray or @withitgirl because we’d love to see them.
Happy sewing (or gluing)!

Playlist for your crafting below :)
Justine is a writer and contributor at Withitgirl and loves surfing, skating, and sustainability!
© 2020-2021 withitgirl. All rights reserved. We appreciate your feedback!


Great reading your blog posst